Tag: images

  • 2 Months of Photo Blogging

    2 Months of Photo Blogging


    Since January first, I’ve been posting a picture a day on photo.cate.blog. Now I’ve been doing it for long enough to consider it a proper project, I asked one of my colleagues for a suggestion for a better theme, and she suggested this one – Cubic. I really like it.

    An incomplete list of what I’m getting out of it:

    • Using the WordPress apps every day.
    • Doing so in less controlled environments: blogging in spare moments and odd places (e.g. On the chairlift whilst skiing).
    • Thinking more about media, what a good media experience looks like.
    • Revisiting older photos.
    • Being present and capturing photos of today.
    • Doing more editing of photos. I’m using the 16:9 ratio a lot lately.
    • Using more pictures I took on this blog, too.
    • Playing more with Android camera. There are some bugs, but I love when it creates panoramas for me.

    A lot of New Years resolutions go nowhere. But this one seems to be sticking. How about you?

  • I Wrote a Book Chapter and Finally, You Can Read It

    I Wrote a Book Chapter and Finally, You Can Read It

    app

    My 2014 side project was a technical book chapter on image processing for the Architecture of Open Source 500 Lines or Less Project. It was my bête noire, that consumed various evenings and weekends either by actual work, or by guilt.

    2015 was mainly guilt, and some editing.

    Recently the final copy edits came back, I read it one last time, and now I never need to read it again. You can though, the online version is here and the print copy will be out at some point.

    For me, the process of writing a book chapter was one of coming to deeply hate a project that I had at one point, loved. But returning to it one last time, after enough time away from it, I was able to see why I had found that project so fascinating, and appreciate in retrospect the amount of care and work that had gone into it.

    I really hope that others get something out of it. It’s about colour, and creating image filters, but also about testing the untestable, and the joys and benefits of prototyping.

    [read it]

  • Creating and Comparing Images on Android

    Creating and Comparing Images on Android

    IMG_8440

    A while ago, I wrote this blog post on creating and comparing UIImages. That code allowed me to develop the image processing part of the app against my unit tests, which was really, really helpful given that I rewrote it about four times to make it performant enough.

    So, when I started writing Android code it was one of the first things I ported. Firstly let me say – way easier on Android than iOS. A tiny difference in the API was a gotcha, iOS takes arguments x, y, width, height, and a comparable function on Android takes x1, y1, x2, y2. But other than that it was much more straightforward, basically because of how much easier it is to delve into the pixels.

    To create a one color image, you can just set the color and draw to the canvas:


    /**
    * A one color image.
    * @param width
    * @param height
    * @param color
    * @return A one color image with the given width and height.
    */
    public static Bitmap createImage(int width, int height, int color) {
    Bitmap bitmap = Bitmap.createBitmap(width, height, Bitmap.Config.ARGB_8888);
    Canvas canvas = new Canvas(bitmap);
    Paint paint = new Paint();
    paint.setColor(color);
    canvas.drawRect(0F, 0F, (float) width, (float) height, paint);
    return bitmap;
    }


    But if you want to set individual pixels you can just call setPixel(). So to create a 3×3 2-color-alternating image (I find this a really useful test image):


    /**
    * A 3×3 2-color image.
    * @param color1
    * @param color2
    * @return A 3×3 image alternating the two colors.
    */
    public static Bitmap createTwoColorImage(int color1, int color2) {
    Bitmap bitmap = Bitmap.createBitmap(3, 3, Bitmap.Config.ARGB_8888);
    bitmap.setPixel(0, 0, color1);
    bitmap.setPixel(2, 0, color1);
    bitmap.setPixel(1, 1, color1);
    bitmap.setPixel(0, 2, color1);
    bitmap.setPixel(2, 2, color1);
    bitmap.setPixel(1, 0, color2);
    bitmap.setPixel(0, 1, color2);
    bitmap.setPixel(2, 1, color2);
    bitmap.setPixel(1, 2, color2);
    return bitmap;
    }

    This is similar to the way we can create an image from an array of colors:


    /**
    * A image from an array of colors.
    * @param width
    * @param height
    * @param colors
    * @return image of given width and height filled with the given color array.
    */
    public static Bitmap createImage(int width, int height, int[] colors) {
    Bitmap bitmap = Bitmap.createBitmap(width, height, Bitmap.Config.ARGB_8888);
    int x = 0;
    int y = 0;
    for (int color : colors) {
    bitmap.setPixel(x, y, color);
    x++;
    if (x == width) {
    x = 0;
    y++;
    }
    }
    return bitmap;
    }

    On iOS creating from an array was sufficiently complicated that I felt like the simpler creation methods were also worthwhile. On Android I’m less certain! I may refactor them to just call the array function.

    But now we have made our test images, we need to be able to compare them. As before, I’m defining two images as the same iff (if and only if) they have the same width, height, and the pixels are the same color. For now I’m able to do an exact comparison, but I may add some kind of tolerance here as the code evolves.


    /**
    * Compare two images.
    * @param bitmap1
    * @param bitmap2
    * @return true iff both images have the same dimensions and pixel values.
    */
    public static boolean compareImages(Bitmap bitmap1, Bitmap bitmap2) {
    if (bitmap1.getWidth() != bitmap2.getWidth() ||
    bitmap1.getHeight() != bitmap2.getHeight()) {
    return false;
    }
    for (int y = 0; y < bitmap1.getHeight(); y++) {
    for (int x = 0; x < bitmap1.getWidth(); x++) {
    if (bitmap1.getPixel(x, y) != bitmap2.getPixel(x, y)) {
    return false;
    }
    }
    }
    return true;
    }

    These helper methods have been a really important part of my testing strategy on both platforms – the image processing is the core of the app, and I want to be sure it works really well.

  • Creating Test Images and Comparing UIImages

    Creating Test Images and Comparing UIImages

    IMG_7749

    I’ve been working on this app which relates to my obsession with color. It’s an image processing app, and you can see some pictures made with it on our Tumblr.

    This involved learning about how to take images apart and put them back together, rewriting a lot of stuff in C for performance, etc. But one of the other problems I faced was a question of how to test things involving images? How do I create test images? And how do I compare them?

    Creating Test Images

    The simplest way to do this is to to draw the image into context. This is super not performant, so isn’t really viable for much other than small test images, but does work.

    I have three little helper functions that create some test images that I can work with.


    // Make an image all of one size, in whatever color.
    + (UIImage *)createTestImageWithWidth:(CGFloat)width
    height:(CGFloat)height
    color:(UIColor *)color {
    CGRect rect = CGRectMake(0, 0, width, height);
    UIGraphicsBeginImageContext(rect.size);
    [color set];
    UIRectFill(rect);
    UIImage *testImage = UIGraphicsGetImageFromCurrentImageContext();
    UIGraphicsEndImageContext();
    return testImage;
    }
    // Create a 3×3 image alternating between two colors.
    + (UIImage *)createTestImageNineQuadrantsWithColor1:(UIColor *)color1
    color2:(UIColor *)color2 {
    // Create an image with 4 quadrants of color.
    CGRect rect = CGRectMake(0, 0, 3.0, 3.0);
    UIGraphicsBeginImageContext(rect.size);
    [color1 set];
    UIRectFill(CGRectMake(0, 0, 1, 1));
    UIRectFill(CGRectMake(2, 0, 1, 1));
    UIRectFill(CGRectMake(1, 1, 1, 1));
    UIRectFill(CGRectMake(0, 2, 1, 1));
    UIRectFill(CGRectMake(2, 2, 1, 1));
    [color2 set];
    UIRectFill(CGRectMake(1, 0, 1, 1));
    UIRectFill(CGRectMake(0, 1, 1, 1));
    UIRectFill(CGRectMake(2, 1, 1, 1));
    UIRectFill(CGRectMake(1, 2, 1, 1));
    UIImage *image = UIGraphicsGetImageFromCurrentImageContext();
    UIGraphicsEndImageContext();
    return image;
    }
    // Create a 2×2 image with each quadrant a different color.
    + (UIImage *)createTestImageWithFourColors {
    // Create an image with 4 quadrants of color.
    CGRect rect = CGRectMake(0, 0, 2.0, 2.0);
    UIGraphicsBeginImageContext(rect.size);
    [[UIColor redColor] set];
    UIRectFill(CGRectMake(0, 0, 1, 1));
    [[UIColor greenColor] set];
    UIRectFill(CGRectMake(1, 0, 1, 1));
    [[UIColor blueColor] set];
    UIRectFill(CGRectMake(0, 1, 1, 1));
    [[UIColor blackColor] set];
    UIRectFill(CGRectMake(1, 1, 1, 1));
    UIImage *image = UIGraphicsGetImageFromCurrentImageContext();
    UIGraphicsEndImageContext();
    return image;
    }

    view raw

    ImageDrawer.m

    hosted with ❤ by GitHub

    The other thing I have is a function that turns an array of UIColors into an image. This is a bit more complicated, but helpful for some tests.


    // Create an image from an array of colors.
    + (UIImage *)createImageWithPixelData:(NSArray *)pixelData width:(int)width height:(int)height {
    CGColorSpaceRef colorSpace = CGColorSpaceCreateDeviceRGB();
    // Add 1 for the alpha channel
    size_t numberOfComponents = CGColorSpaceGetNumberOfComponents(colorSpace) + 1;
    size_t bitsPerComponent = 8;
    size_t bytesPerPixel = (bitsPerComponent * numberOfComponents) / 8;
    size_t bytesPerRow = bytesPerPixel * width;
    uint8_t *rawData = (uint8_t*)calloc([pixelData count] * numberOfComponents, sizeof(uint8_t));
    CGContextRef context = CGBitmapContextCreate(rawData,
    width,
    height,
    bitsPerComponent,
    bytesPerRow,
    colorSpace,
    (CGBitmapInfo) kCGImageAlphaPremultipliedLast);
    CGColorSpaceRelease(colorSpace);
    int byteIndex = 0;
    for (int index = 0; index < [pixelData count]; index += 1) {
    CGFloat r, g, b, a;
    BOOL convert = [[pixelData objectAtIndex:index] getRed:&r green:&g blue:&b alpha:&a];
    if (!convert) {
    // TODO(cate): Handle this.
    NSLog(@"Failed, continue");
    }
    rawData[byteIndex] = r * 255;
    rawData[byteIndex + 1] = g * 255;
    rawData[byteIndex + 2] = b * 255;
    rawData[byteIndex + 3] = a * 255;
    byteIndex += 4;
    }
    CGImageRef imageRef = CGBitmapContextCreateImage(context);
    UIImage *newImage = [UIImage imageWithCGImage:imageRef];
    CGContextRelease(context);
    CGImageRelease(imageRef);
    return newImage;
    }

    view raw

    ImageMaker.m

    hosted with ❤ by GitHub

    Comparing Images

    This leads me to the question of comparing images. For my purposes (and the app is heavily focused on colors), I can determine if things have worked by comparing two color arrays. I could compare the rawData but  I want to abstract it away a bit to make my tests clearer. So I have another function that is basically the inverse of the one above, which extracts an array of pixels from an image.

    Turning images into arrays of UIColors and vice versa is so-so performance-wise, and UIColors have a huge space overhead compared to the rawData array. It’s fine for testing, for very small images or a proof of concept, but not much more than that.


    // Turn an image into an array of UIColors.
    + (NSArray *)pixelsForImage:(UIImage *)image {
    NSUInteger width = [image size].width;
    NSUInteger height = [image size].height;
    NSUInteger count = width * height;
    NSMutableArray *result = [NSMutableArray arrayWithCapacity:count];
    CGColorSpaceRef colorSpace = CGColorSpaceCreateDeviceRGB();
    // Add 1 for the alpha channel
    size_t numberOfComponents = CGColorSpaceGetNumberOfComponents(colorSpace) + 1;
    size_t bitsPerComponent = 8;
    size_t bytesPerPixel = (bitsPerComponent * numberOfComponents) / 8;
    size_t bytesPerRow = bytesPerPixel * width;
    uint8_t *rawData = (uint8_t*)calloc(count * numberOfComponents, sizeof(uint8_t));
    CGContextRef context = CGBitmapContextCreate(rawData,
    width,
    height,
    bitsPerComponent,
    bytesPerRow,
    colorSpace,
    (CGBitmapInfo) kCGImageAlphaPremultipliedLast);
    CGColorSpaceRelease(colorSpace);
    CGImageRef cgImage = [image CGImage];
    CGContextDrawImage(context, CGRectMake(0, 0, width, height), cgImage);
    int byteIndex = 0;
    for (int i = 0 ; i < count ; ++i) {
    CGFloat red = (rawData[byteIndex] * 1.0) / 255.0;
    CGFloat green = (rawData[byteIndex + 1] * 1.0) / 255.0;
    CGFloat blue = (rawData[byteIndex + 2] * 1.0) / 255.0;
    CGFloat alpha = (rawData[byteIndex + 3] * 1.0) / 255.0;
    byteIndex += 4;
    UIColor *color = [UIColor colorWithRed:red green:green blue:blue alpha:alpha];
    [result addObject:color];
    }
    CGContextRelease(context);
    free(rawData);
    return result;
    }

    Then with two arrays I can just loop through and compare.


    – (void)compareColorArrayRGBs:(NSArray *)array toExpected:(NSArray *)expected {
    XCTAssertEqual([expected count], [array count]);
    for (int i = 0; i < [expected count]; i++) {
    UIColor *color = [array objectAtIndex:i];
    UIColor *expectedColor = [expected objectAtIndex:i];
    CGFloat r, g, b, a;
    CGFloat eR, eG, eB, eA;
    [color getRed:&r green:&g blue:&b alpha:&a];
    [expectedColor getRed:&eR green:&eG blue:&eB alpha:&eA];
    XCTAssertEqualWithAccuracy(r, eR, 0.005);
    XCTAssertEqualWithAccuracy(g, eG, 0.005);
    XCTAssertEqualWithAccuracy(b, eB, 0.005);
    XCTAssertEqualWithAccuracy(a, eA, 0.005);
    }
    }

    view raw

    ImageAsserts.m

    hosted with ❤ by GitHub

  • More Experiments Around RGB Averaging

    More Experiments Around RGB Averaging

    I decided to replicate the showing/hiding the dominant hues in images with showing/hiding around the average RGB values instead.

    I created a class called RGBColor (just holds red, green, and blue values), similar to the one I created called HSBColor. I could have used the java.awt.Color class, but that insists on a range of 0-1 for the values, and I wanted to avoid conversions between that and the 0-255 that Processing uses by default. Or, better, allow me to set the colorMode to be in range 1-100, so that my tolerances were percentages – I found this made it easier to pick good values there.

    Images Showing Colors Around “Average” RGB

    Images Hiding Colors Around “Average” RGB

    Source Code

    package ui;
    
    import model.RGBColor;
    import color.ColorHelper;
    import processing.core.PApplet;
    import processing.core.PImage;
    
    @SuppressWarnings("serial")
    public class AverageRGBImageViewApplet extends PApplet {
    
    	PImage img;
    	static final int rgbTolerance = 50;  // Adjust this.
    
    	public void setup() {
    		size(640,480);
    		background(0);
    		img = loadImage(/* Your image file here */);
    		colorMode(RGB, 100);
    		processImage();
    	}
    
    	public void draw() {
    		image(img, 0, 0, 640, 480);
    	}
    
    	private void processImage() {
    		RGBColor color = ColorHelper.rgbColorFromImage(img, this);
    
    		for (int i = 0; i < img.pixels.length; i++) {
    			int pixel = img.pixels[i];
    			RGBColor pxColor =
    				new RGBColor(red(pixel), green(pixel), blue(pixel));
    			// Adjust this conditional to show/hide around average rgb.
    			if (!rgbInRange(color, pxColor, rgbTolerance)) {
    				float brightness = brightness(pixel);
    				img.pixels[i] = color(brightness);
    			}
    		}
    	}
    
    	private boolean rgbInRange(RGBColor colorA, RGBColor colorB, int tolerance) {
    		return Math.abs(colorA.r - colorB.r) < tolerance &&
    			Math.abs(colorA.g - colorB.g) < tolerance &&
    			Math.abs(colorA.b - colorB.b) < tolerance;
    	}
    }

    ColorHelper.java

    package color;
    
    import processing.core.PApplet;
    import processing.core.PImage;
    import model.RGBColor;
    
    public class ColorHelper {
    
    	public static RGBColor rgbColorFromImage(PImage img, PApplet applet) {
    		img.loadPixels();
    		int numberOfPixels = img.pixels.length;
    		float totalRed = 0f;
    		float totalGreen = 0f;
    		float totalBlue = 0f;
    
    		for (int i = 0; i < numberOfPixels; i++) {
    			int pixel = img.pixels[i];
    			totalRed += applet.red(pixel);
    			totalGreen += applet.green(pixel);
    			totalBlue += applet.blue(pixel);
    		}
    
    		// Calculate final rgb values.
    		float r = totalRed / numberOfPixels;
    		float g = totalGreen / numberOfPixels;
    		float b = totalBlue / numberOfPixels;
    		return new RGBColor(r, g, b);
    	}
    }
  • Eliminating the Dominant Hue from an Image

    Eliminating the Dominant Hue from an Image

    I thought it would be interesting to invert the idea of showing only the dominant hue, and show everything but that instead. I used the exact same code, but inverted the if statement so:

    if (!hueInRange(hue, lower, upper))

    became

    if (hueInRange(hue, lower, upper))

    Effect is as follows, as with most of these, my favourite effect is on the painting – does it work better because it is a more studied use of color? I’m going to make something that will compare and contrast the effects, and allow me to loop through pictures so I can look for interesting results.

  • Folders of Images, Compare and Contrast

    Folders of Images, Compare and Contrast

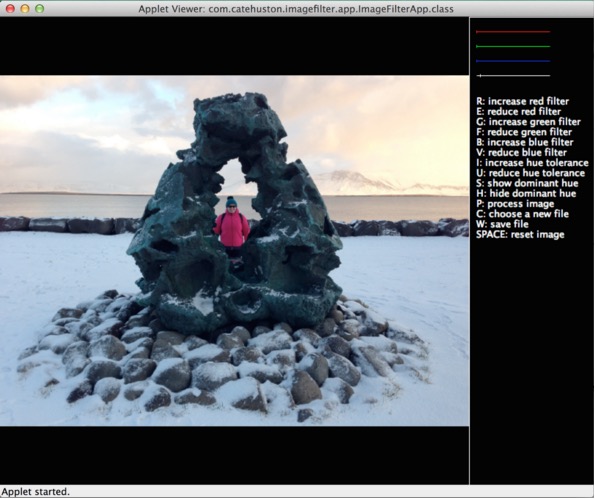
    Now I’ve experimented with things, I wanted to make something that would allow me to compare different effects on the same photo, and loop through a folder of pictures looking for nice effects.

    I overrode mousePressed() to change the image on click.

    The big challenge here was running out of Java Heap space once I had more than one image being processed – most of the images are around 2MB each. This meant I couldn’t just read in the image 3 times and manipulate it (or not manipulate it), and even drawing the original first then manipulating it meant I had two manipulated images. I tried a few things here, starting with just increasing the heap size, to no avail. Eventually what I did was resize the image down to the size I was going to display, and creating new images of that size, and then copying the pixels over.

    That resolved the issue, except when looping through the images and taking screenshots – I have no idea why this would affect things. For the most part, it worked fine though.

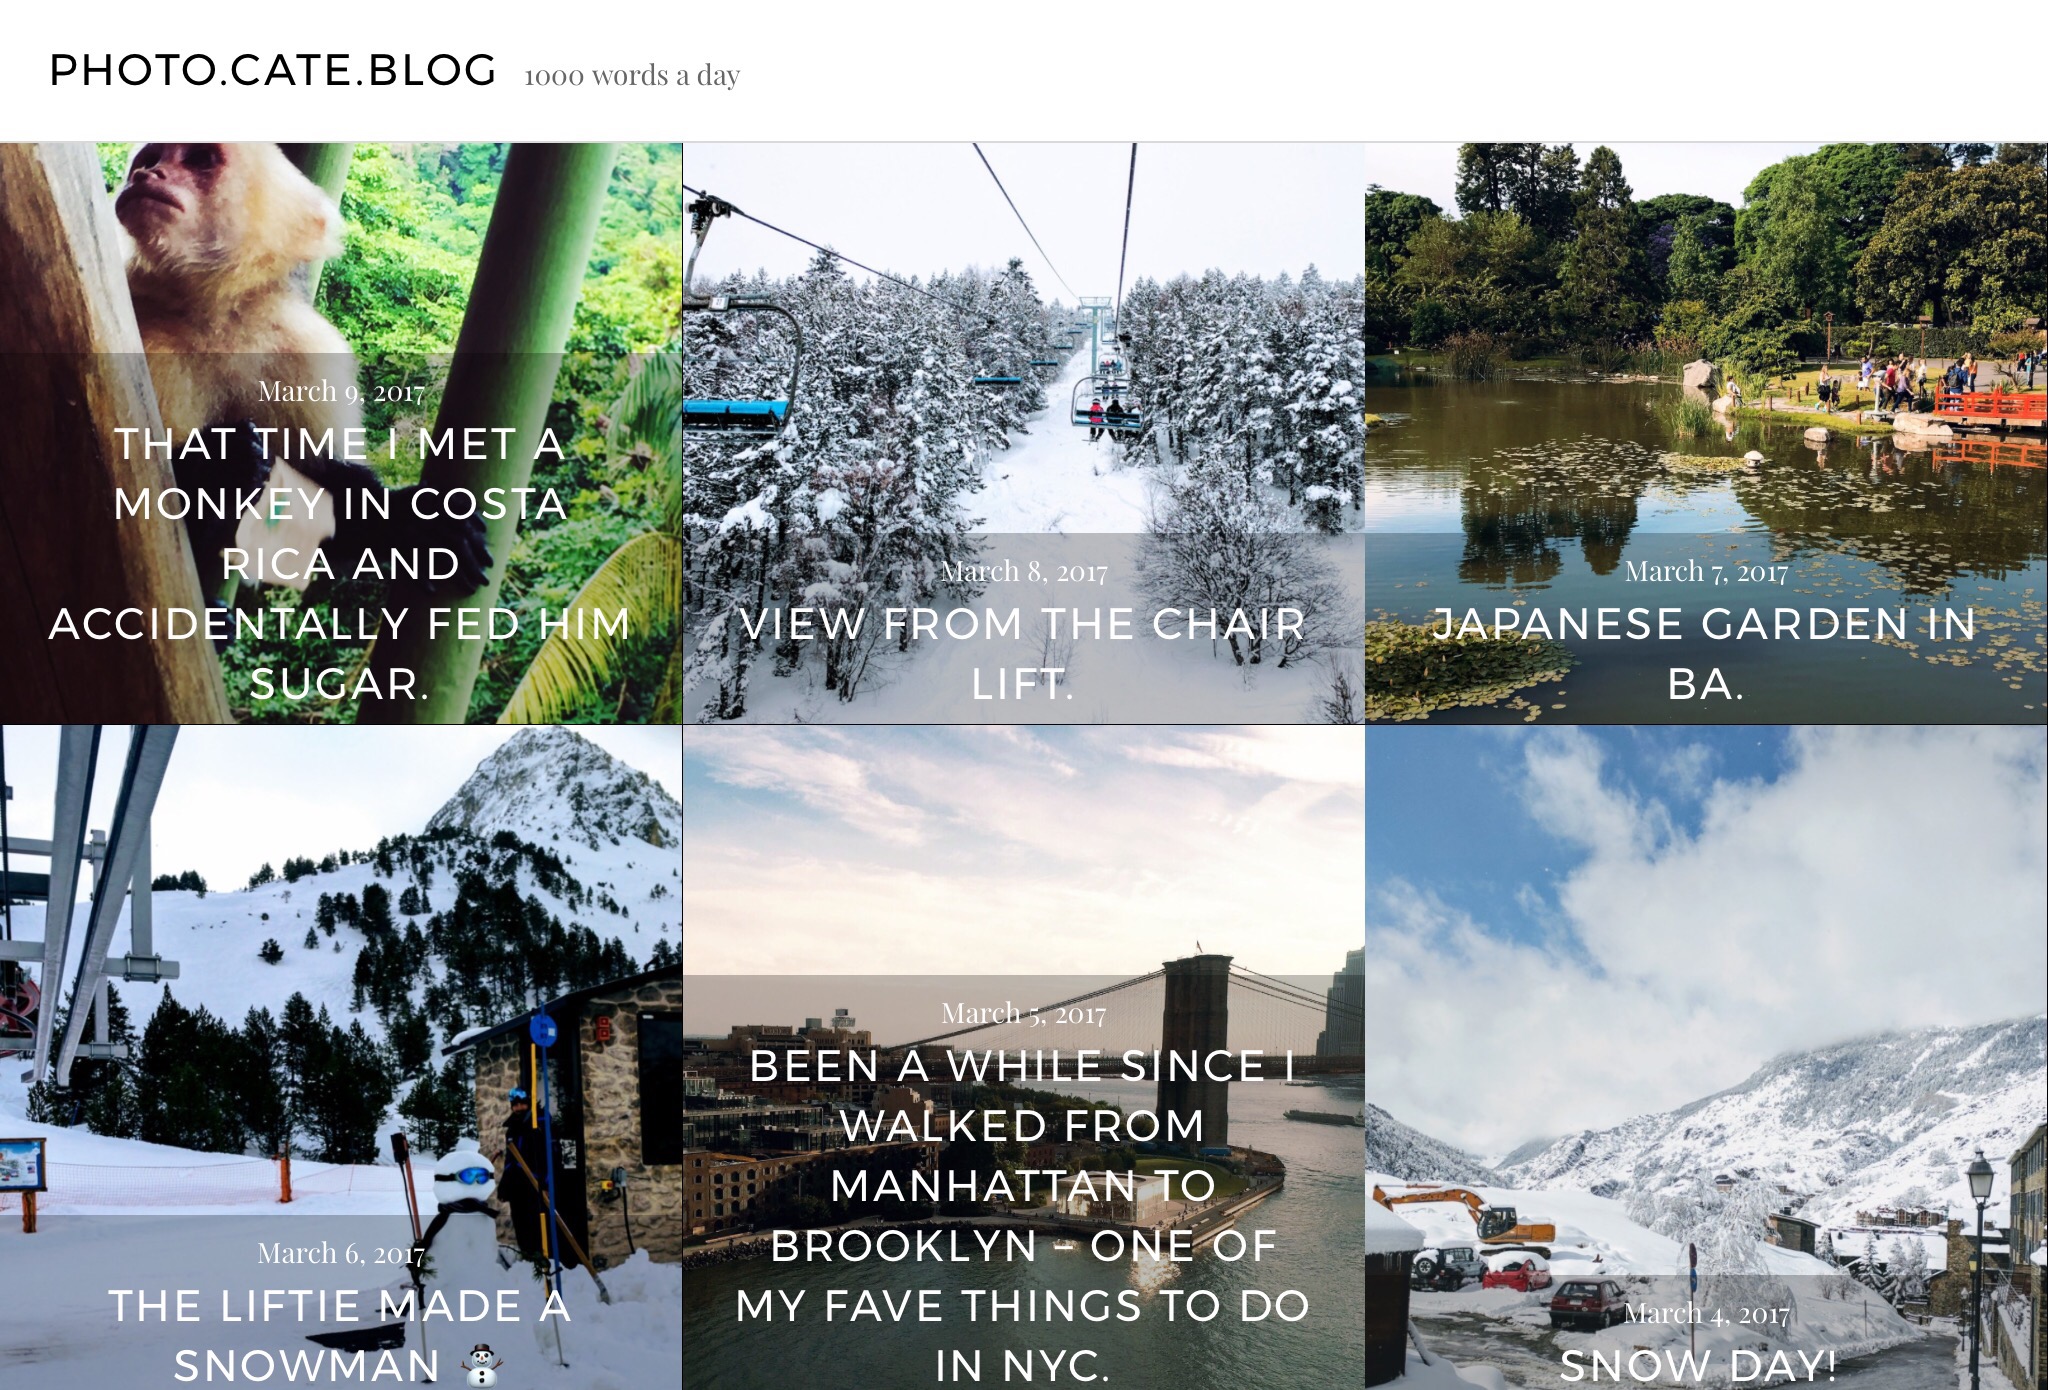
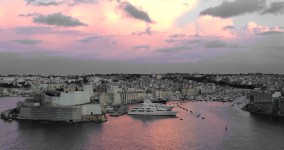
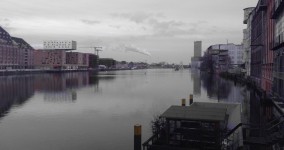
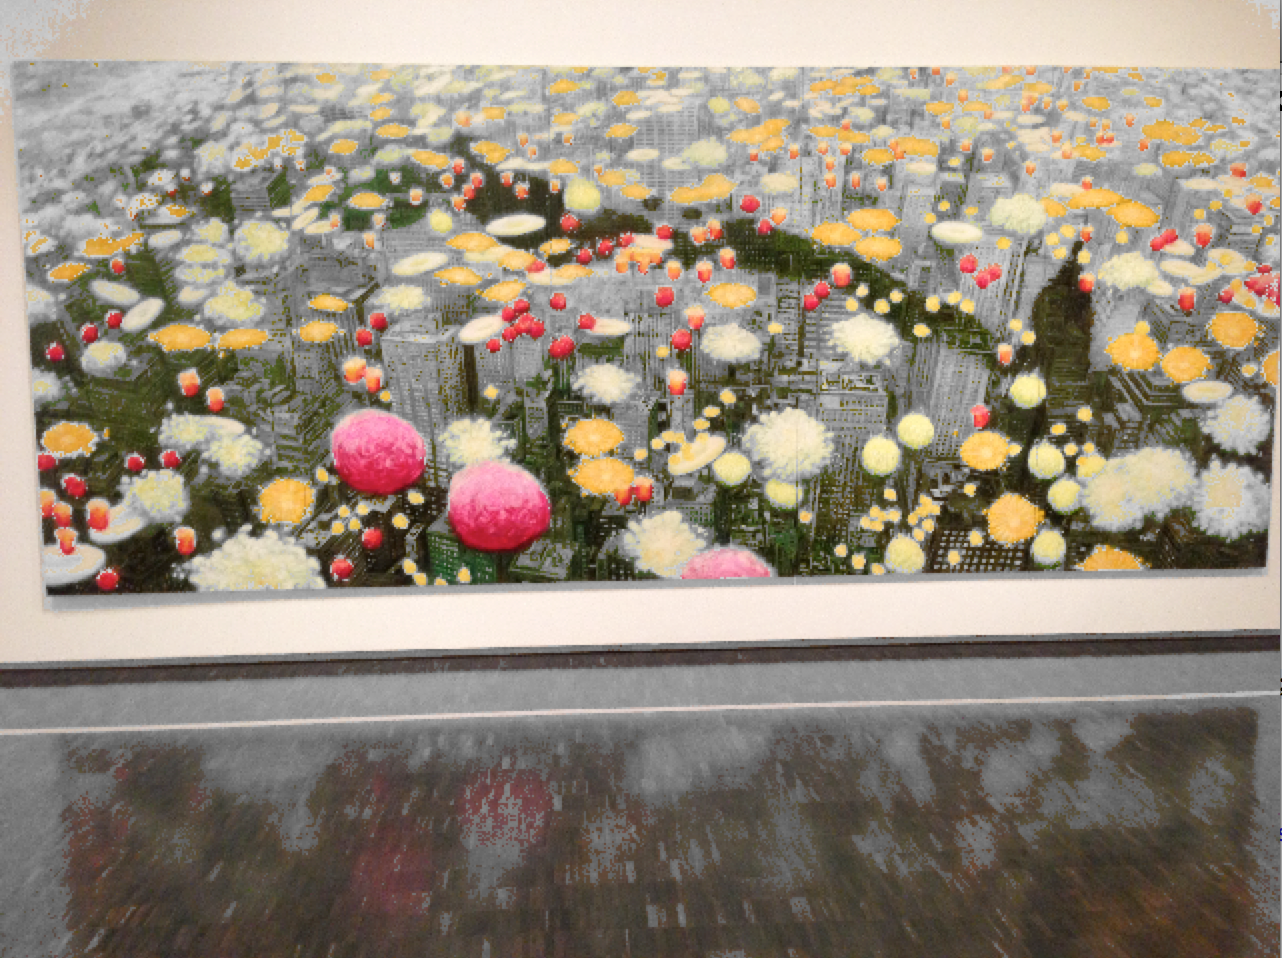
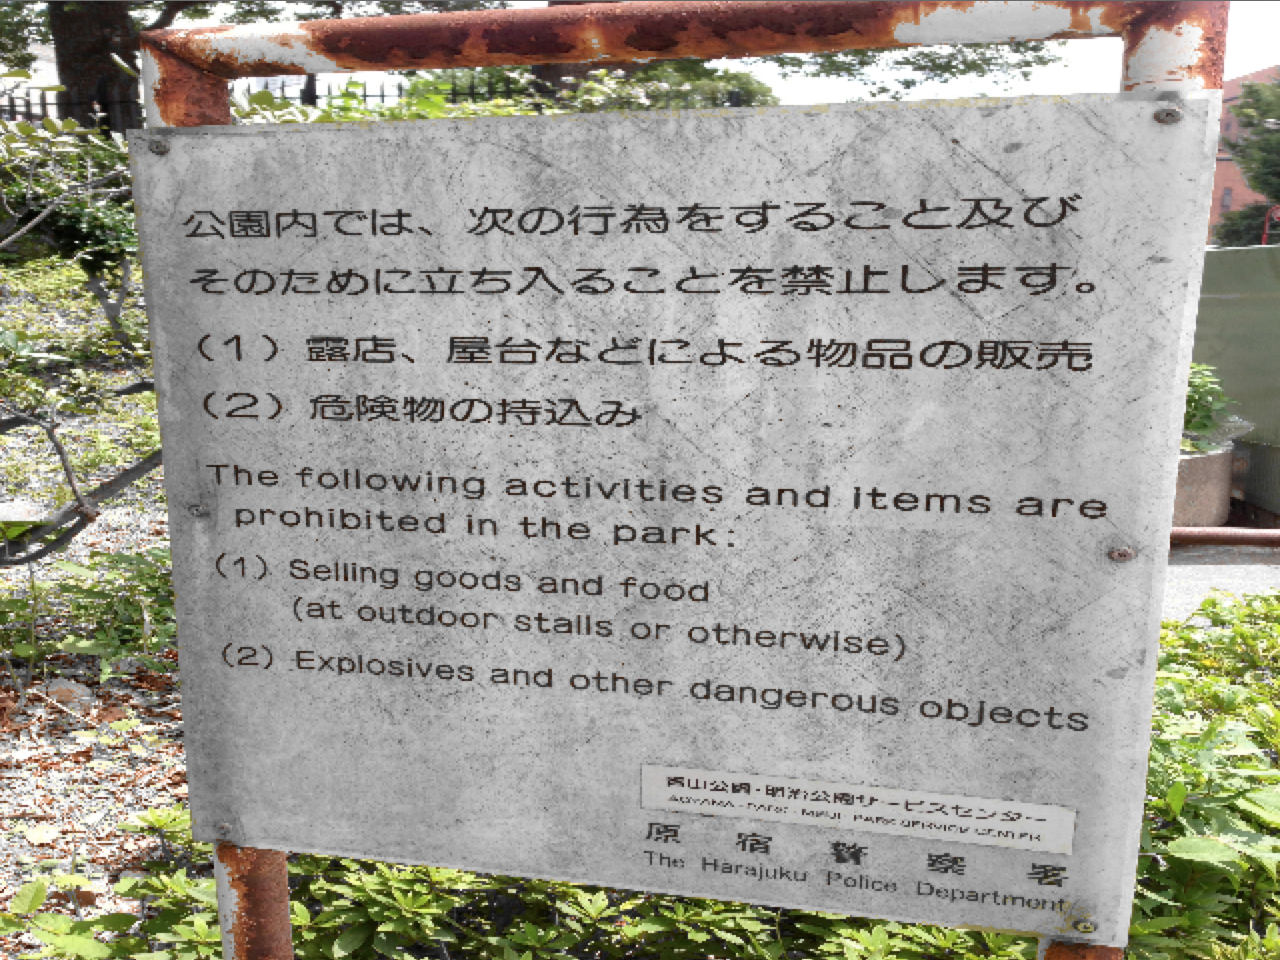
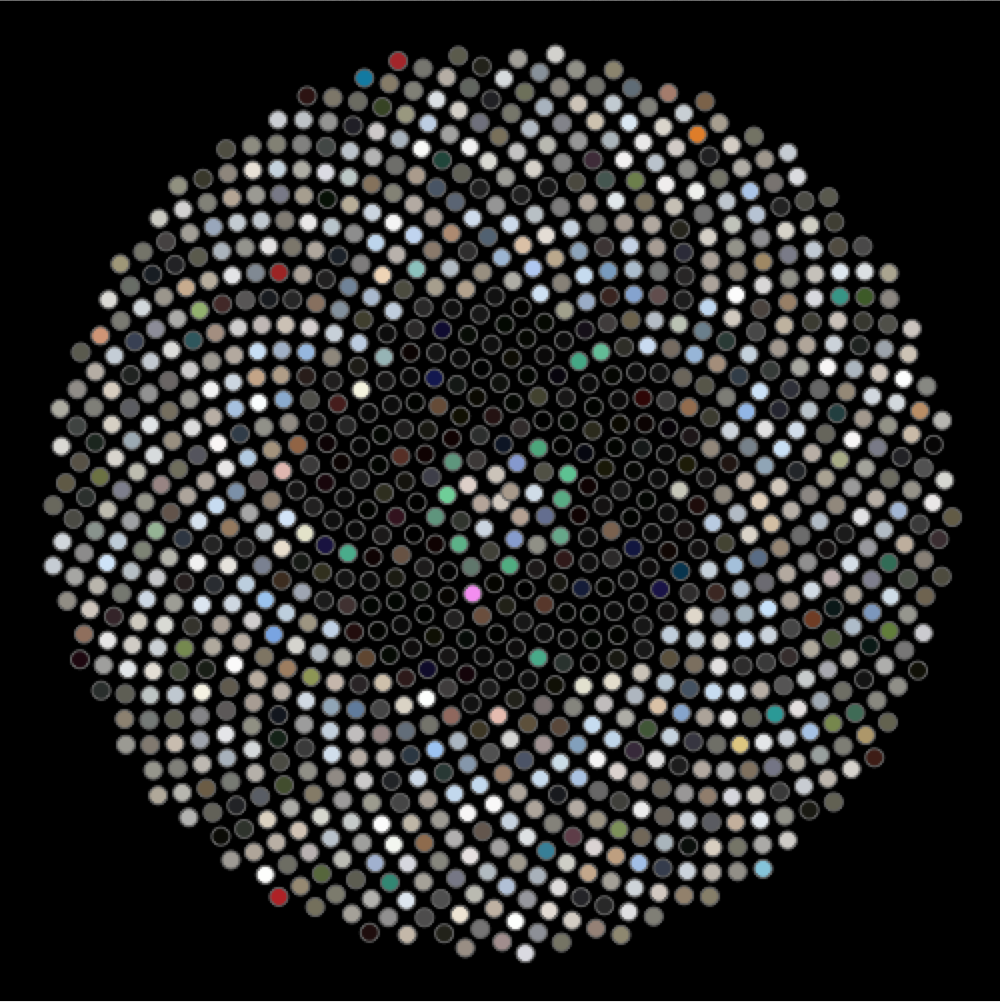
    It’s nice to compare the effects side-by-side, see the different bits that are highlighted, depending on the effect. Sometimes it just looks like the weather is completely different. I really love the night-time photos, and the effect that makes them black and white… apart from the lights. Including in this post my favourites and those I found most interesting.

    One suggestion I’ve had is to ignore pixels that are at extremes in saturation/brightness (i.e. close to black or white), but having looked at the effects on more images, I’m not convinced that is going to make things better.

     img 1
    img 2

    img 3
    img 4
    img 5
    img 6
    img 7
    img 8
    img 9
    img 10
    img 11
    img 12
    img 13
    img 14
    img 15
    img 16
    img 17
    img 18
    img 19
    img 20
    img 21
    img 22
    img 23
    img 24
    img 25
    img 26
    img 27
    img 28
    img 29
    img 30
    img 31
    img 32
    img 33
    img 34
    img 35
    img 36
    img 37
    img 38
    img 39
    img 40

    Source Code

    ColorHelper.java

    package color;
    
    import processing.core.PApplet;
    import processing.core.PImage;
    import model.HSBColor;
    
    public class ColorHelper {
    
    	public static HSBColor hsbColorFromImage(PImage img, PApplet applet, int hueRange) {
    		img.loadPixels();
    		int numberOfPixels = img.pixels.length;
    		int[] hues = new int[hueRange];
    		float[] saturations = new float[hueRange];
    		float[] brightnesses = new float[hueRange];
    
    		for (int i = 0; i < numberOfPixels; i++) {
    			int pixel = img.pixels[i];
    			int hue = Math.round(applet.hue(pixel));
    			float saturation = applet.saturation(pixel);
    			float brightness = applet.brightness(pixel);
    			hues[hue]++;
    			saturations[hue] += saturation;
    			brightnesses[hue] += brightness;
    		}
    
    		// Find the most common hue.
    		int hueCount = hues[0];
    		int hue = 0;
    		for (int i = 1; i < hues.length; i++) {
     			if (hues[i] > hueCount) {
    				hueCount = hues[i];
    				hue = i;
    			}
    		}
    
    		// Return the color to display.
    		float s = saturations[hue] / hueCount;
    		float b = brightnesses[hue] / hueCount;
    		return new HSBColor(hue, s, b);
    	}
    }

    CompareAndContrastHue.java

    package ui;
    
    import java.io.File;
    
    import color.ColorHelper;
    import model.HSBColor;
    import processing.core.PApplet;
    import processing.core.PImage;
    
    @SuppressWarnings("serial")
    public class CompareAndContrastHue extends PApplet {
    
    	int fileIndex = 0;
    	private String[] fileNames;
    	private static String filePath = "../data/images/";
    
    	static final int hueRange = 320;
    	static final int hueTolerance = 40;
    	private static final int imageWidth = 384;
    	private static final int imageHeight = 268;
    
    	public void setup() {
    		size(3*imageWidth, imageHeight);
    		background(0);
    		noLoop();
    		colorMode(HSB, hueRange - 1);
    		// Read in images.
    		File dir = new File(filePath);
    		fileNames = dir.list();
    		nextFileIndex();
    	}
    
    	public void draw() {
    		PImage img = loadImage(filePath + fileNames[fileIndex]);
    		img.loadPixels();
    		img.resize(imageWidth, imageHeight);
    		HSBColor color = ColorHelper.hsbColorFromImage(img, this, hueRange);
    		image(img, imageWidth, 0, imageWidth, imageHeight);
    
    		// Display image only showing dominant hue.
    		drawImage(createImage(imageWidth, imageHeight, HSB), img.pixels, color,
    				0, 0, imageWidth, imageHeight, false);
    
    		// Display image excluding dominant hue.
    		drawImage(createImage(imageWidth, imageHeight, HSB), img.pixels, color,
    				2 * imageWidth, 0, imageWidth, imageHeight, true);
    	}
    
    	public void mousePressed() {
    		nextFileIndex();
    		redraw();
    	}
    
    	private void drawImage(PImage img, int[] pixels, HSBColor color,
    			int x, int y, int width, int height, boolean showDominantHue) {
    		img.loadPixels();
    		// Manipulate photo, grayscale any pixel that isn't close to that hue.
    		for (int i = 0; i < img.pixels.length; i++) {
    			int pixel = pixels[i];
    			float hue = hue(pixel);
    			if (hueInRange(hue, color.h, hueTolerance) == showDominantHue) {
    				float brightness = brightness(pixel);
    				img.pixels[i] = color(brightness);
    			} else {
    				img.pixels[i] = pixel;
    			}
    		}
    		image(img, x, y, width, height);
    	}
    
    	private void nextFileIndex() {
    		while (true) {
    			fileIndex++;
    			if (fileIndex < fileNames.length) {
    				if (fileNames[fileIndex].toLowerCase().contains(".jpg")) {
    					break;
    				}
    			} else {
    				fileIndex = 0;
    			}
    		}
    	}
    
    	private static boolean hueInRange(float hueA, float hueB, int tolerance) {
    		return Math.abs(hueA - hueB) < tolerance;
    	}
    }
  • Visualising A Photo Series

    Visualising A Photo Series

    Whenever I’m scrolling through pictures I’ve taken, it seem like they are in sections – here’s when I was near the beach, he’s the park, the night sky and fireworks. I thought if you visualised the way that the dominant colors changed, patterns would emerge.

    I found the perfect layout for this, the sunflower layout, and then did nothing about it for… a long time. I claim the craziness of work and life. Also, I knew nothing about color, and had no idea how I would go about extracting the dominant color from an image.

    But I did some research and figured it out, the trick was working with hues rather than RGB values.

    And voila, here is another way to see the story of my trip to North Korea.

    Sunflower Visualization from Photos Taken in North Korea
    Sunflower Visualization from Photos Taken in North Korea

    Maybe the main thing I can see from this experiment is that I don’t take as colorful photos as I like to imagine I do. Also, that I took a lot of photos in North Korea (the major bottleneck to my blog posts about it).

    So I put together another collection of images – almost everything I’ve taken since mid-June aside from in North Korea, including the shipwreck, my trips to Tasmania, Queenstown (skiing!), Hong Kong, Tokyo and photos I’d taken around Sydney and visualised that with the result below.

    Sunflower visualization from photos taken between mid-June and late-August (aside from NK)
    Sunflower visualization from photos taken between mid-June and late-August (aside from NK)

    This is where I discovered that it doesn’t work well with panoramas (I had recently discovered the panorama feature on my iPhone and had taken a few, typically at 5-7MB in size) which threw an exception, because it was out of Java heap space. I’d need to make the code more efficient to process panoramas – for now, I just left them out.

    I’d like to add more to it, maybe clicking on an element in the layout could bring up the photo, with only the dominant color (with some tolerance) exposed. Maybe animate it with the image that’s being processed displayed alongside. I’d love to pull in my most recent pictures on Twitter and display them this way. I think, how many images are needed to create something cool looking may make that prohibitive, though. For now, I’m happy that I’ve got something working.

    Processing one image like this doesn’t take a noticeable amount of time, however this first (NK) one is made from 1048 images, and 2.26GB of data. On my 13″ Macbook pro… it takes a while.

    Note – I made an HSBColor class that just holds hue, saturation, and brightness.


    Source Code


    import java.io.File;
    
    import processing.core.PApplet;
    import processing.core.PImage;
    
    @SuppressWarnings("serial")
    public class SunflowerImages extends PApplet {
    
    	private static String filePath = "../data/nkimages/";
    	private String[] fileNames;
    
    	static final int hueRange = 320;
    	private static final int radius = 9;
    	private static final int scale = 7;
    
    	private static final double goldenangle = Math.PI * (3 - Math.sqrt(5));
    
    	private static final int wh = 500;
    
    	public void setup() {
    		size(wh, wh);
    		background(0);
    		noLoop();
    		colorMode(HSB, hueRange - 1);
    		// Read in images.
    		File dir = new File(filePath);
    		fileNames = dir.list();
    	}
    
    	public void draw() {
    		int n = 0;
    		double a = 0;
    
    		for (String file : fileNames) {
    			PImage img = loadImage(filePath + file);
    			if (img == null) {
    				continue;
    			}
    			print("processing image: " + file + "\n");
    
    			double h = Math.sqrt(n)*scale;
    			double x = wh/2 + Math.sin(a) * h;
    			double y = wh/2 + Math.cos(a) * h;
    
    			stroke(100);
    			HSBColor color = extractColorFromImage(img);
    			fill(color.h, color.s, color.b);
    			ellipse((float) x, (float) y, radius, radius);
    
    			a+=goldenangle;
    			n++;
    		}
    	}
    
    		private HSBColor extractColorFromImage(PImage img) {
    			img.loadPixels();
    			int numberOfPixels = img.pixels.length;
    			int[] hues = new int[hueRange];
    			float[] saturations = new float[hueRange];
    			float[] brightnesses = new float[hueRange];
    
    			for (int i = 0; i < numberOfPixels; i++) {
    				int pixel = img.pixels[i];
    				int hue = Math.round(hue(pixel));
    				float saturation = saturation(pixel);
    				float brightness = brightness(pixel);
    				hues[hue]++;
    				saturations[hue] += saturation;
    				brightnesses[hue] += brightness;
    			}
    
    			// Find the most common hue.
    			int hueCount = hues[0];
    			int hue = 0;
    			for (int i = 1; i < hues.length; i++) {
     				if (hues[i] > hueCount) {
    					hueCount = hues[i];
    					hue = i;
    				}
    			}
    
    			// Return the color to display.
    			float s = saturations[hue] / hueCount;
    			float b = brightnesses[hue] / hueCount;
    			return new HSBColor(hue, s, b);
    		}
    }
  • Showing Only the Dominant Hue In an Image

    Showing Only the Dominant Hue In an Image

    Having extracted the dominant hue from the images, we can manipulate the image such that pixels that are not (or close to) the dominant hue are instead made grayscale.

    I converted to grayscale using the brightness of the image in the HSB. This worked really nicely.

    From my earlier experiments I decided on a hue range of 320 (320 buckets).

    I varied the tolerance (from 1 – 20) of how far away from the dominant hue we would show on the same four images, with varying results of aesthetic pleasingness. How dominant the dominant color in the image is really varies the effect. One of them, pretty much didn’t work at all until I hit a tolerance of about 55 – at which point, 1/3 of the spectrum.

    import processing.core.PApplet;
    import processing.core.PImage;
    
    @SuppressWarnings("serial")
    public class DominantHueImageViewApplet extends PApplet {
    
    	PImage img;
    	static final int hueRange = 320; 
    	static final int hueTolerance = 10;  // Adjust this.
    
    	public void setup() {
    		size(640,480);
    		background(0);
    		img = loadImage("" /* Your image goes here */);
    		colorMode(HSB, (hueRange - 1));
    		processImage();
    	}
    
    	public void draw() {
    		image(img, 0, 0, 640, 480);
    	}
    
    	private void processImage() {
    		img.loadPixels();
    		int numberOfPixels = img.pixels.length;
    		int[] hues = new int[hueRange];
    		float[] saturations = new float[hueRange];
    		float[] brightnesses = new float[hueRange];
    
    		for (int i = 0; i < numberOfPixels; i++) {
    			int pixel = img.pixels[i];
    			int hue = Math.round(hue(pixel));
    			float saturation = saturation(pixel);
    			float brightness = brightness(pixel);
    			hues[hue]++;
    			saturations[hue] += saturation;
    			brightnesses[hue] += brightness;
    		}
    
    		// Find the most common hue.
    		int hueCount = hues[0];
    		int dominantHue = 0;
    		for (int i = 1; i < hues.length; i++) {
     			if (hues[i] > hueCount) {
    				hueCount = hues[i];
    				dominantHue = i;
    			}
    		}
    
    		// Manipulate photo, grayscale any pixel that isn't close to that hue.
    		int lower = dominantHue - hueTolerance;
    		int upper = dominantHue + hueTolerance;
    		print("dominentHue" + dominantHue);
    		for (int i = 0; i < numberOfPixels; i++) {
    			int pixel = img.pixels[i];
    			float hue = hue(pixel);
    			if (!hueInRange(hue, lower, upper)) {
    				float brightness = brightness(pixel);
    				img.pixels[i] = color(brightness);
    			}
    		}
    	}
    
    	private static boolean hueInRange(float hue, int lower, int upper) {
    	        // Should compensate for it being circular here - can go around.
                    return hue < upper && hue > lower;
    	}
    }